


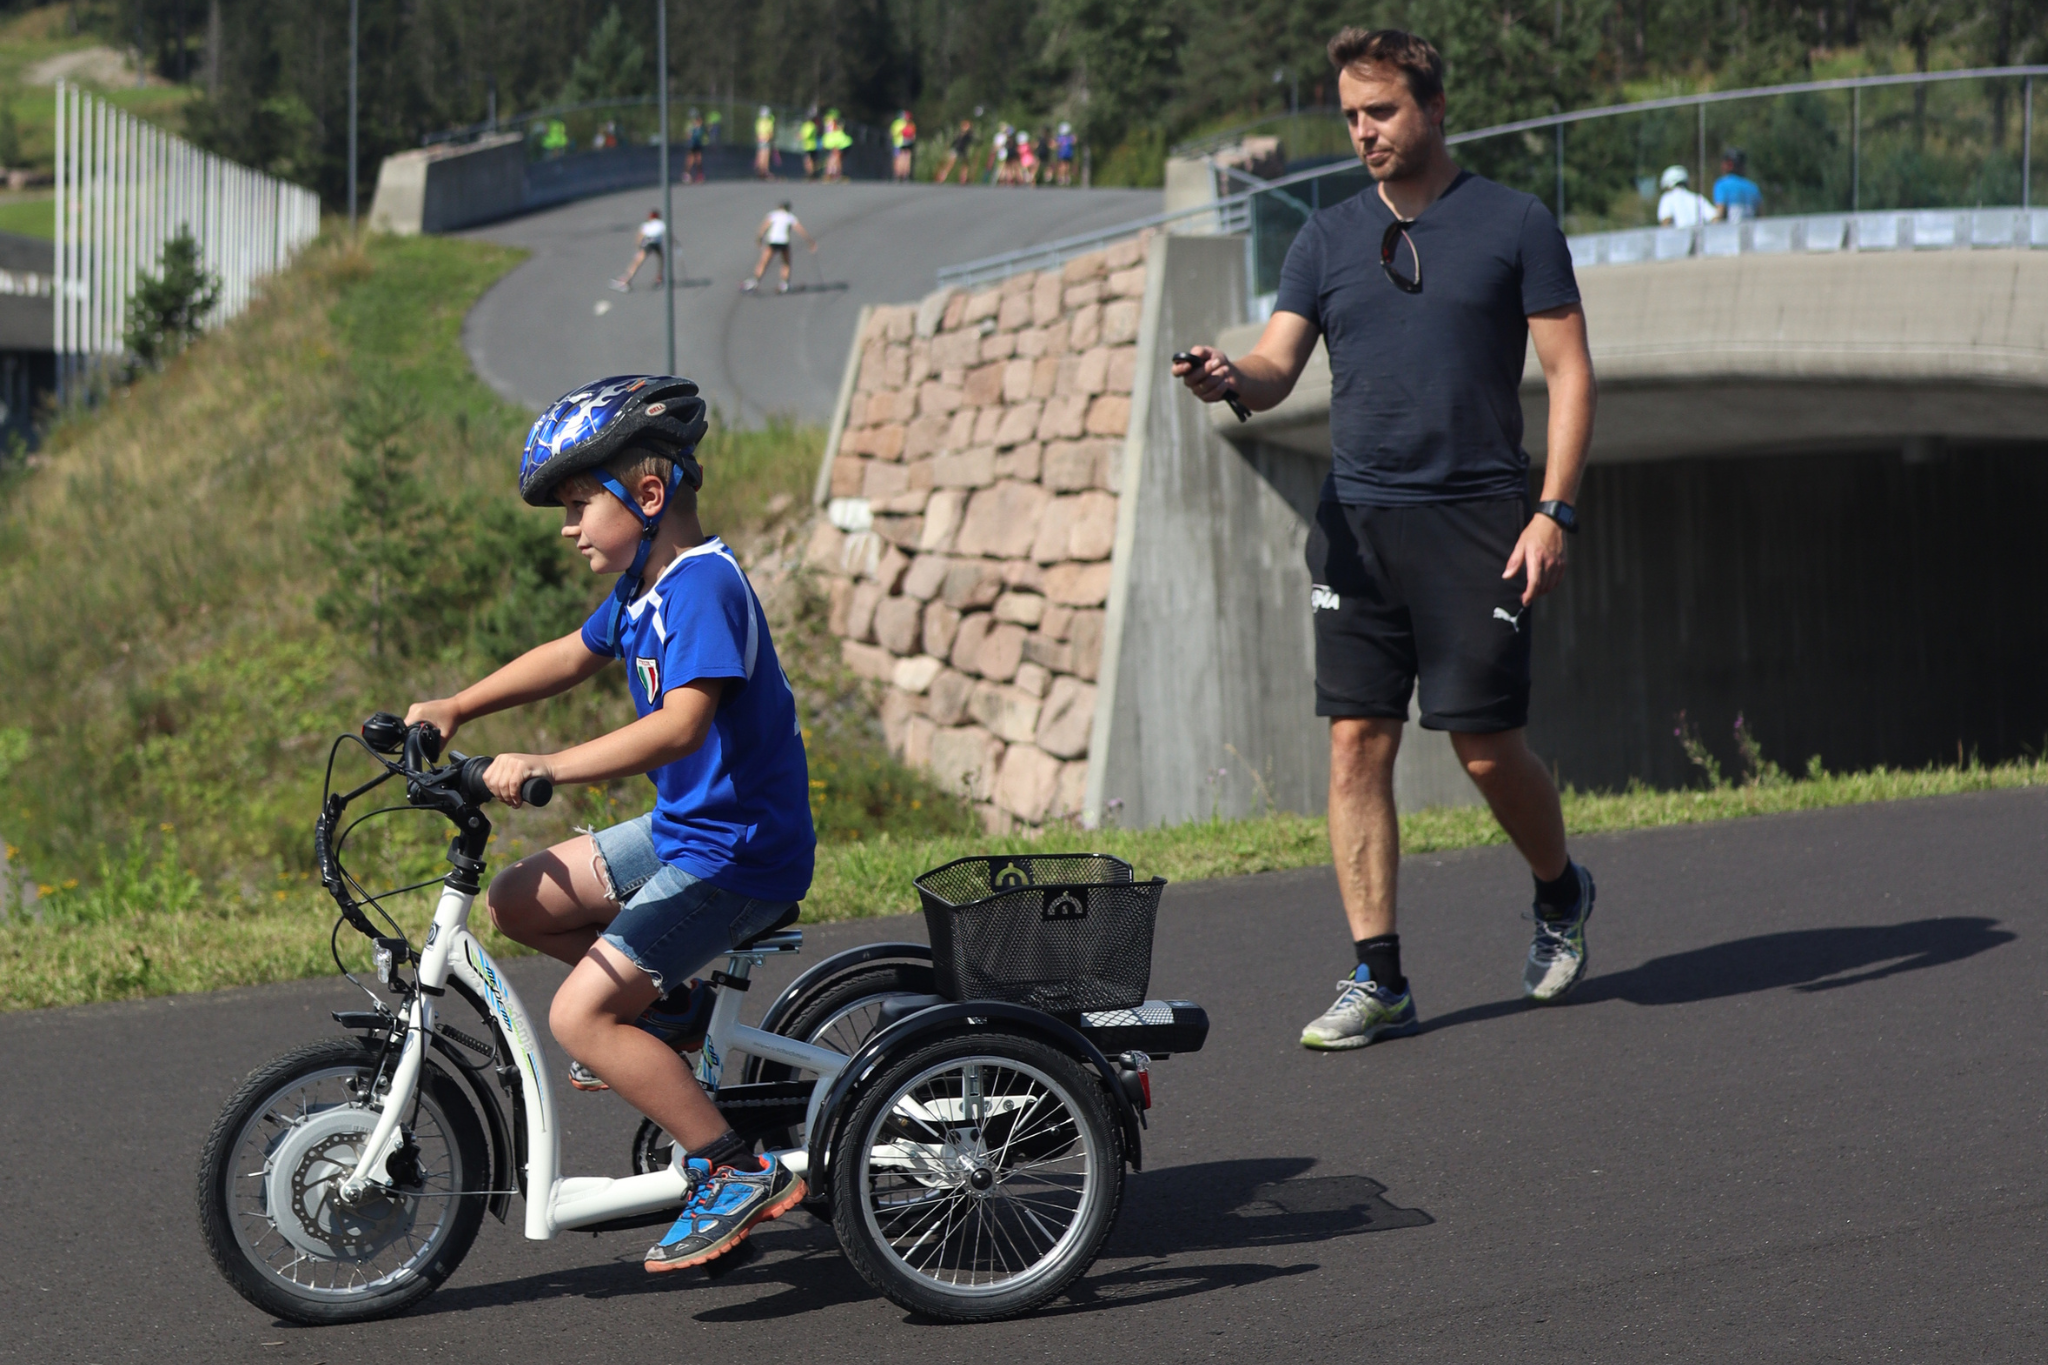
SmartBrake is an assistive braking system designed to make cycling safer and easier. This guide helps you from the moment you receive your SmartBrake system to your first safe bike ride.
This guide is for:
- cyclists
- parents
- companions
- caregivers
If you are going to install the full braking system on the bike, you should use the Technician Guide instead.
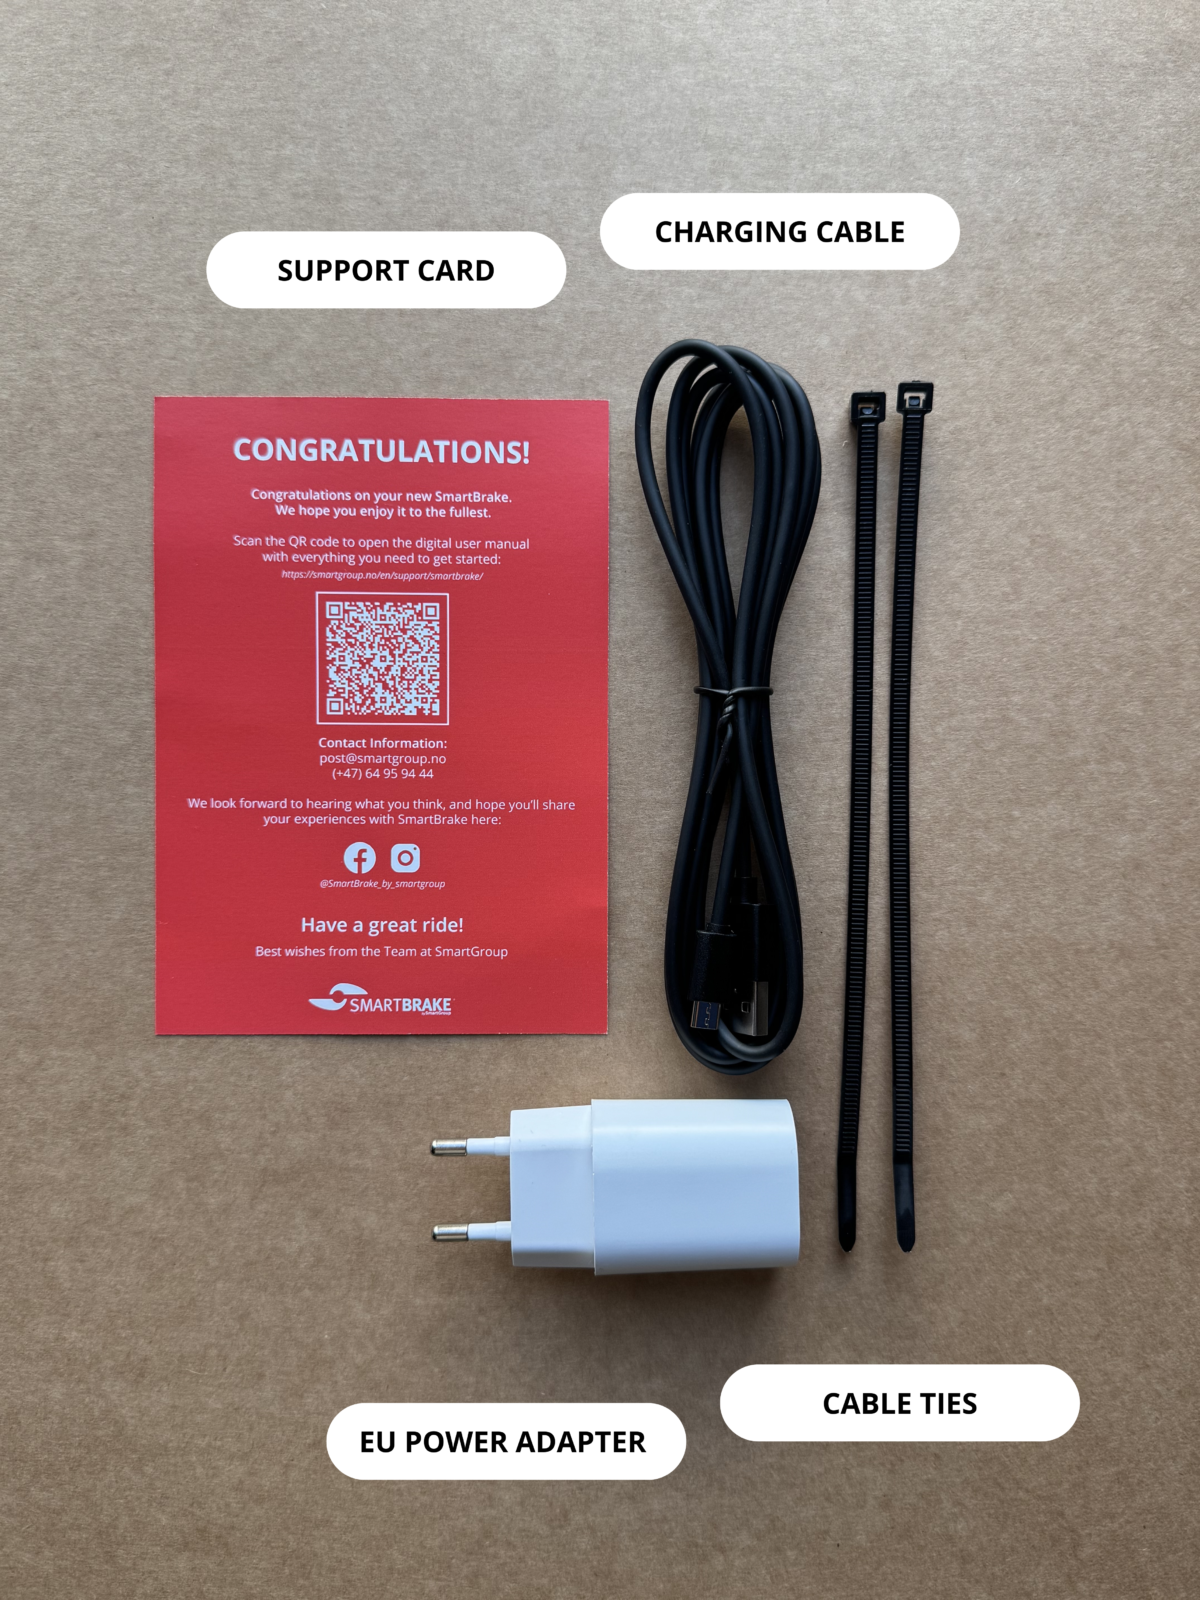
1. What is in the box?
The SmartBrake package include:
- SmartBrake unit
- one or more controllers
- charger
- straps or mounting parts
- support card with QR code
Some setups also include a physical brake lever and brake components that are already installed or ready to be installed.
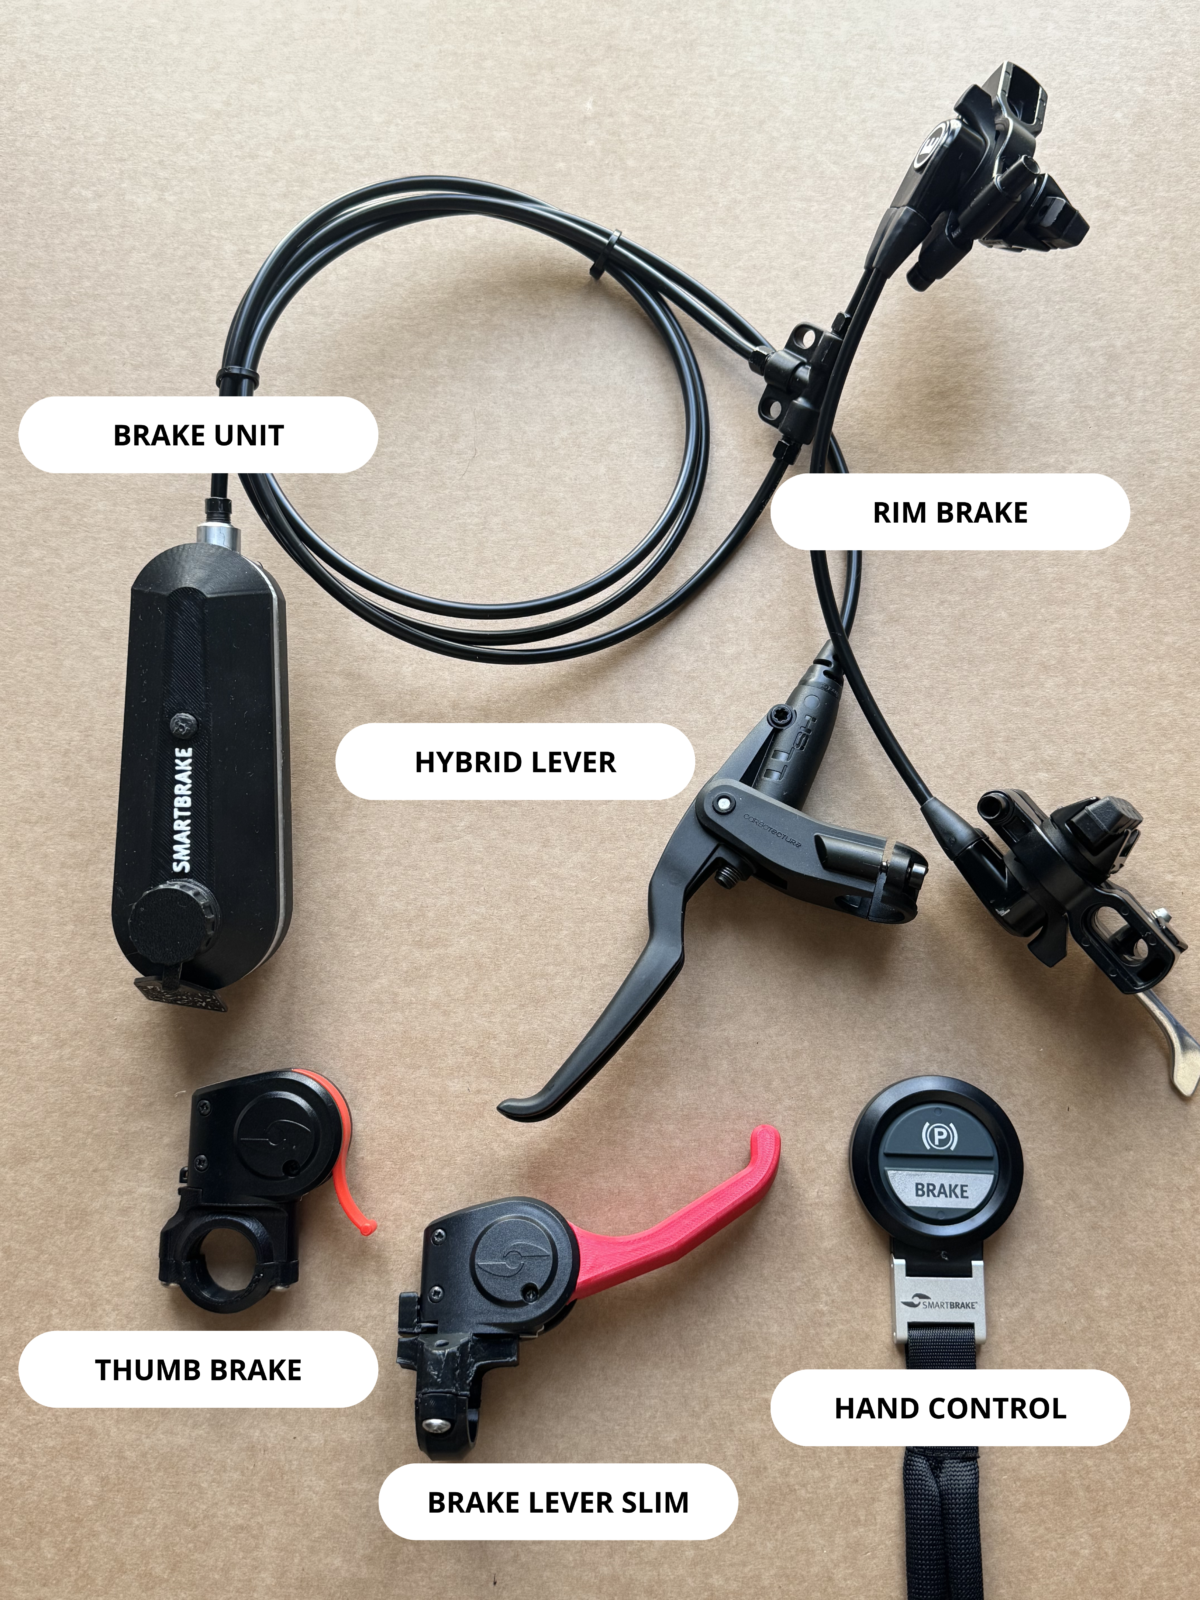
2. Get to know the controller
SmartBrake can be supplied with one or more controllers.
Hand Controller
A wireless remote control that is often used by a companion to brake when needed.
Brake Lever Slim
A lightweight brake lever that provides full SmartBrake braking power with very little hand force.
Thumb Brake
A wireless brake activated with the thumb. For some cyclists, this feels easier and more natural than pulling a brake lever.
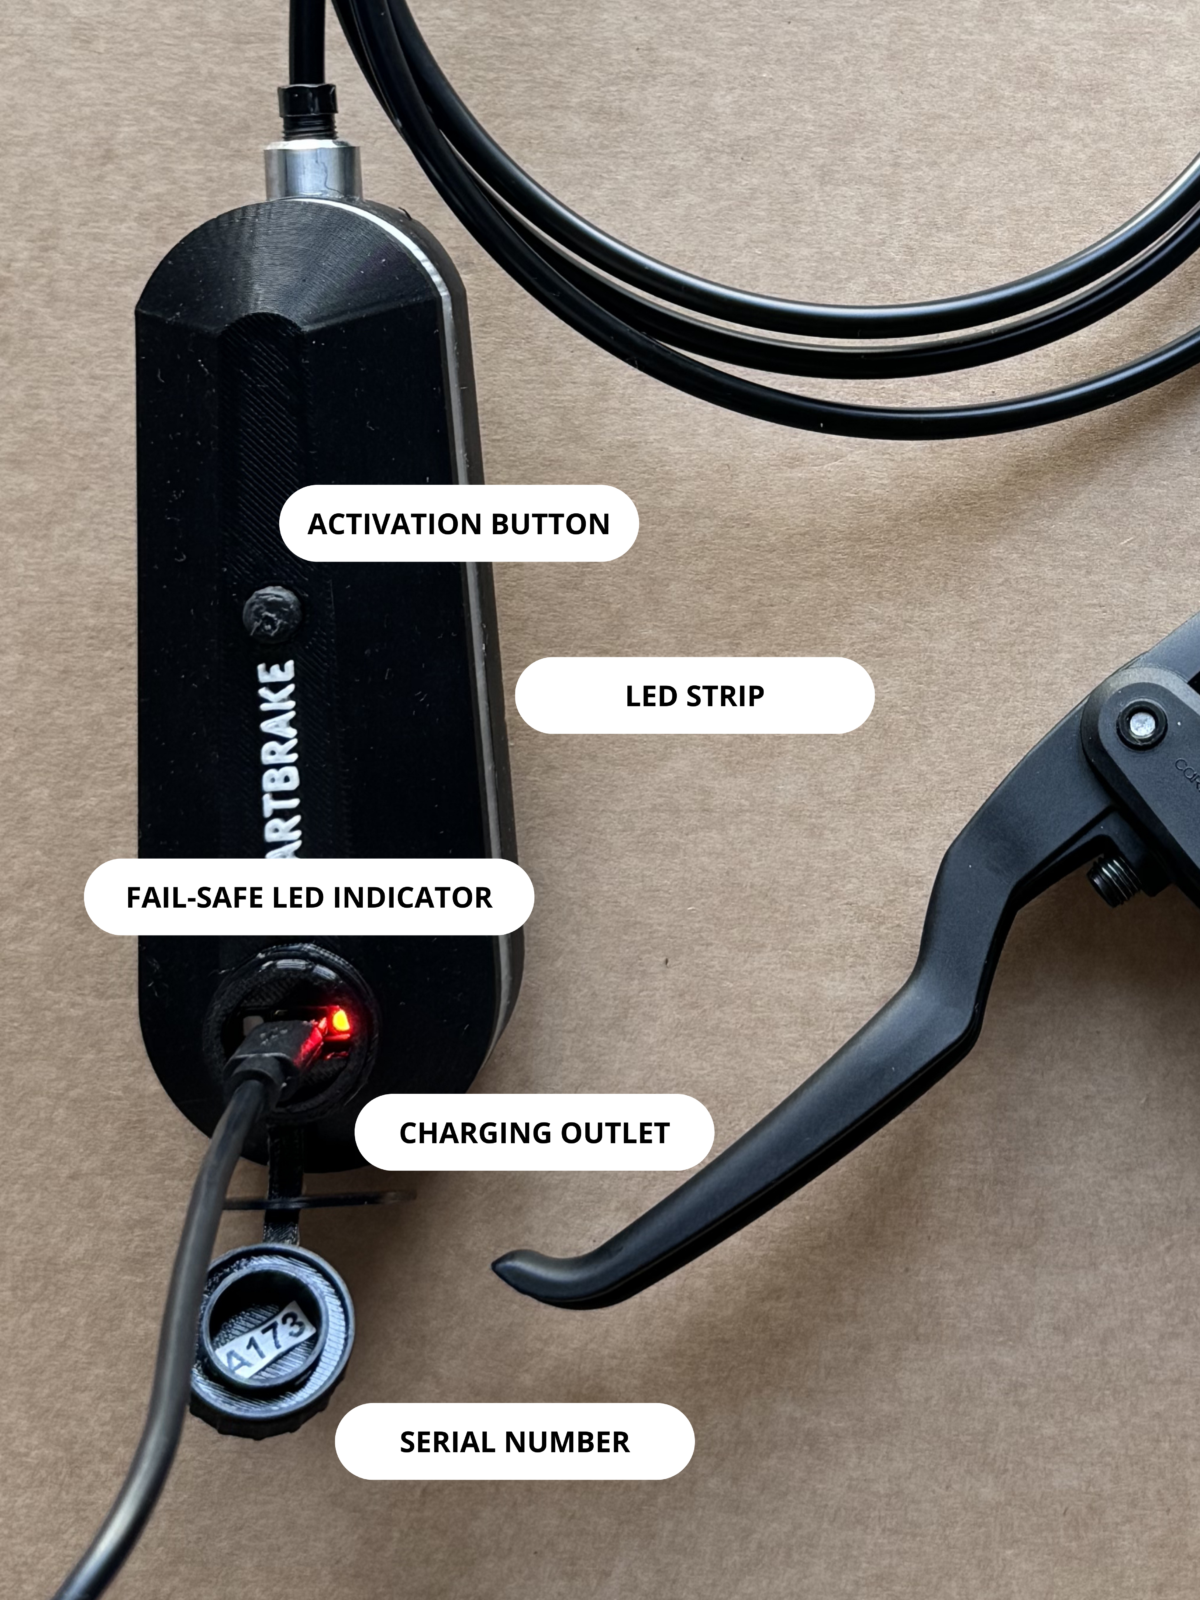
3. How to turn on SmartBrake
Press the button on the SmartBrake unit once.
When SmartBrake starts:
- red lights turn on
- the system performs a safety check
- fail-safe is active at startup
This means the wheels may remain locked until you activate the controller.
4. Release fail-safe before riding
Before you start riding, you must activate the controller once.
This releases fail-safe and allows the wheels to roll freely.
You should not begin riding until you have checked that the wheels rotate normally.
Important: If fail-safe cannot be released immediately, the SmartBrake brake can be released by turning off the unit. See point 6 below. In that case, you continue riding using only the secondary brake.
5. Test the brakes before every ride
Before your first ride, and regularly after that, you should perform a simple brake check.
Quick test
- walk next to the bike
- roll it slowly forward
- activate the controller
- check that the bike clearly brakes or stops
First ride
Test the brakes at very low speed in a safe area without traffic or pedestrians.
If the brake feels weak, slow, or unusual, stop and contact support.
6. Turn off SmartBrake after the ride
To turn off SmartBrake, press and hold the button on the unit for about 3 seconds until the light indicates that the system is powering off.
If SmartBrake remains on for more than 1 hour without the brake being used, the system turns off automatically to save power. When this happens, the parking brake is activated at the same time.
7. Keep the battery charged
The SmartBrake unit must be charged regularly. If the battery level gets low, the system warns you with lights.
A low battery level can affect how the system behaves and may, in some cases, cause fail-safe to activate.
Also remember that the controller has its own battery, which must be replaced when needed.
Et lavt batterinivå kan påvirke hvordan systemet oppfører seg, og i noen tilfeller føre til at fail-safe aktiveres.
Husk også at kontrolleren har eget batteri som må byttes ved behov.
Low batt Unit
Low batt Controller
Charging Unit
8. If you are unsure about power or battery status
If SmartBrake does not respond as expected:
- check that the unit is turned on
- check the battery status
- check that the controller has battery power and is connected
See the separate guides for charging, light signals, and troubleshooting if you need more help.
Important things to remember...
- Charge the SmartBrake unit regularly
- Replace the controller battery when needed
- If the wheel remains locked, see the fail-safe guide
- If the controller does not connect, see the pairing guide
- If you see warning lights, see the light signals guide
Do you need help?
If you contact support, you should include:
- SmartBrake serial number
- bike brand and model
- a short description of the issue
- a short video if possible


